We so often get the question: DWARF 3 vs Seestar S50, which one should we choose?
The DWARF 3 and the Seestar S50 are both smart telescopes on paper, but in practice they serve two completely different types of users. Where one is all about freedom, control and wide images, the other focuses on instant results and detail.
DWARF 3 vs. Seestar S50: Price and what you can do with it right away
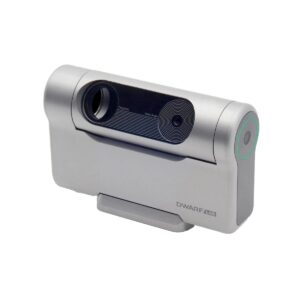
The DWARF 3 costs around €575 in most cases and comes with a travel bag, solar filters and a large 10,000 mAh battery. A tripod is missing, so you have to add that yourself before you can get started.
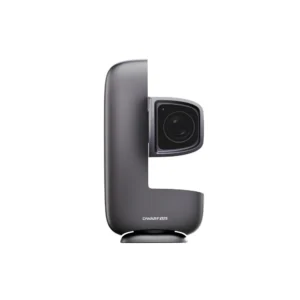
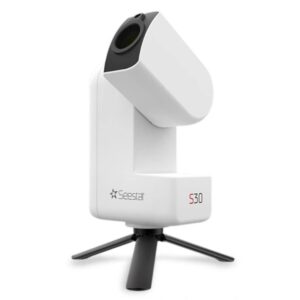
The Seestar S50 is slightly above that price, around €629, but in return you can get started right out of the box. A tripod, solar filter, travel bag and internal storage of 64 GB are all already included.
What immediately stands out: the DWARF 3 is better equipped for longer sessions due to its larger battery and 128 GB of storage, while the Seestar is attractive precisely because of its completeness out of the box. Those who do not want to pick out individual parts will feel more comfortable with the Seestar S50.
DWARF 3 vs. Seestar S50: Optics and character of both telescopes
The DWARF 3 works with a 35 mm telephoto lens and a modern Sony IMX678 sensor of 8.3 megapixels. This gives you a wide field of view in which large objects, think of the Andromeda Nebula come into their own beautifully.
The Seestar S50 takes a very different direction: a focal length of 250 mm and a 2 megapixel IMX462 sensor. That sounds lower in megapixels, but the longer focal length actually makes small objects appear sharper and more detailed.
In practice, you see that difference immediately. The DWARF 3 feels like a wide-angle camera that opens up the sky. The Seestar S50 feels like a telephoto lens that brings you closer to the action.
Solar photography: two styles of the same subject
Both the DWARF 3 and the Seestar S50 come standard with a solar filter, making them both suitable for photographing sunspots. With the DWARF 3, you click the filter on magnetically, very quickly and intuitively, and the app lets you move through the image immediately.
The Seestar S50 delivers slightly more brightness and contrast, making sunspots stand out just a bit sharper. Those who like the fact that the camera automatically focuses and shows a nice image right away will immediately like that difference.

Moon observation: detail vs. flexibility
Both models provide strong, automatically stacked images of the moon. The Seestar S50 shows just a little more detail in crater walls and terminator lines thanks to its larger aperture.
The DWARF 3 compensates for that with flexibility. You can adjust settings, vary exposures, and the automatic tracking combines steadiness with more control over your final photo.
Therefore, the Seestar S50 feels more like, “click and enjoy,” while the DWARF 3 offers more room to play with settings and edits.

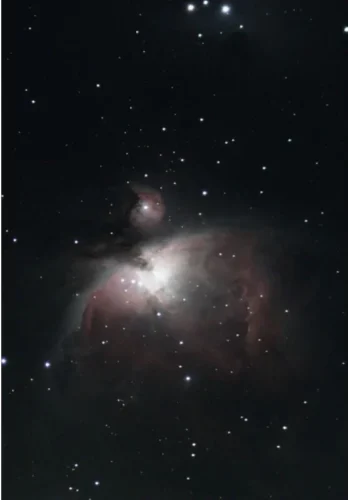
Deep-sky astrophotography
As soon as you get into the deep sky, nebulae, star clusters, galaxies, the DWARF 3 starts moving forward considerably. That's because you can put the DWARF 3 in EQ mode, allowing longer exposures without field rotation. The longer you can expose, the more nebular structure becomes visible! Scroll down for the examples.
With the Seestar S50, there is no such option. The telescope operates in Alt-Az setup and is therefore limited to short exposures of 10-30 seconds. In urban areas, this actually often produces neat, sharp stars, but in long sessions you lose detail due to field rotation.
In tests on objects such as the Andromeda Nebula, the Heart Nebula and the Pleiades, the DWARF 3 clearly showed deeper structures and more subtle details. In contrast, the Seestar gave more compact objects a surprisingly sharp appearance.


Dwarf 3 vs. Seestar S50: the planets
Both smart scopes are not made for planets of course. They have far too short a focal length to provide really good results. But for a beginner, the results below can be quite something
So we really want to emphasize that they are not made for planets. The pictures below were taken by experienced astrophotographers to test the limits of these two smart scopes.


User experience and apps
Anyone using the DWARF 3 will quickly realize that you have an instrument in your hands that invites you to learn. You move with a virtual joystick, set filters, and have access to tracking modes normally found only on larger setups. That gives freedom, but also requires just a little more patience.
The Seestar S50 is built precisely for simplicity. You open the app, choose an object, and within seconds everything is automatic: focusing, tracking, stacking. You can see the results quickly, without thinking about settings.
Filters, formats and storage
Both telescopes are equipped with useful built-in filters for astrophotography in light-polluted environments. The DWARF 3 offers multiple adjustable filters: a VIS filter for daytime, a Astro-filter for night use and a Duoband filter for emission nebulae such as the Heart and Veil Nebulae. The Seestar S50 also includes as standard a internal Duoband filter, which is essential for isolating hydrogen and oxygen emission in deep-sky objects.
In terms of storage, the DWARF 3 with 128 GB a clear advantage over the 64 GB of the Seestar S50. Both models support RAW formats such as FITS and AVI, and offer live stacking, but the DWARF 3 also allows for manual processing of individual frames which gives advanced photographers more control over image quality.
Final score: DWARF 3 vs Seestar S50
| Aspect | Winner |
|---|---|
| Wide angle & wide objects | DWARF 3 |
| Detail & sharpness | Seestar S50 |
| Battery & storage | DWARF 3 |
| Ease of use | Seestar S50 |
| Astrophotography potential | DWARF 3 |
| Suitable for beginners | Both |
The Seestar S50 is ideal for those who want to see beautiful results quickly without technical settings.
The DWARF 3 is perfect for those who want to go a step further, including EQ mode, more control and wider sky objects.
So there is no winner, both telescopes offer something for everyone!